
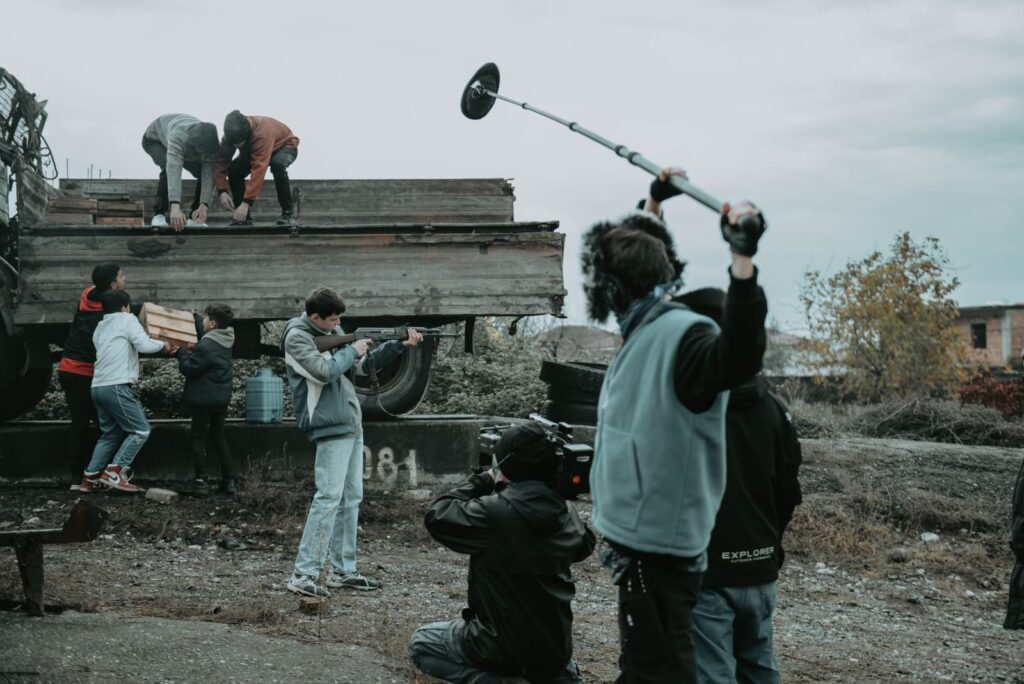
Audiences will forgive a lot in a video: a slightly soft focus, an imperfect frame, even a shaky shot. What they will not forgive is bad sound. Muffled dialogue, echo, hiss and background noise make viewers switch off quickly, and they are much harder to fix in post production than most people expect. Recording clean audio is less about expensive gear and more about technique. Here is how to get it right at the source.
Get the microphone close
The most important rule in location sound is simple: the closer the microphone is to the sound source, the better. A microphone captures everything around it, and the further it is from the speaker, the more room echo and background noise it picks up relative to the voice. This is why the built in microphone on a camera almost always sounds poor. It is too far from the subject and close to the camera’s own handling noise.
Choose the right microphone
Lavalier microphones
Small clip on microphones, often called lavs or lapel mics, sit on the subject’s clothing, close to their mouth. They are ideal for interviews, presenters and situations where the subject moves around. Wired lavs are inexpensive; wireless systems give more freedom. Place them on the chest, around a hand’s width below the chin, and secure the cable so it does not rub against clothing.
Shotgun microphones
Shotgun microphones are directional: they pick up sound mostly from the direction they are pointed and reject some sound from the sides. On a boom pole held just out of frame above the speaker, a shotgun is the standard tool for narrative film dialogue. Mounted on top of a camera, it is better than the built in microphone but still limited by distance.
Handheld and USB microphones
Handheld microphones suit reporters and vox pops. USB and XLR studio microphones are excellent for voiceovers and narration recorded in a quiet room.
Choose and treat your location
Many audio problems are really location problems. Before you record, stand in the room silently for a minute and listen.
- Turn off noise sources: fridges, air conditioning, fans, heaters, buzzing lights and notification sounds on phones and computers. Leave a note or your car keys in the fridge so you remember to turn it back on.
- Avoid echoey rooms. Bare walls, hard floors and large empty spaces create reverberation. Rooms with carpets, curtains, sofas, bookshelves and soft furnishings sound much better.
- Add soft materials. Blankets, duvets and cushions placed out of shot can absorb reflections and reduce echo.
- Watch for outside noise: traffic, construction, planes, neighbors. Close windows and plan around noisy times.
Set your levels properly
Recording levels determine how loud the signal is when it reaches your recorder or camera.
- Too low, and you will need to boost it later, which raises the background hiss too.
- Too high, and the audio clips: the loudest moments distort, and clipping cannot be properly repaired.
- For digital audio, a common target is for normal speech to peak somewhere around minus 12 dB, leaving headroom for louder moments.
- Set levels manually rather than relying on automatic gain, which can pump the background noise up and down between phrases.
- If your recorder offers 32 bit float recording, it provides much more protection against clipping, but good mic placement still matters.
Always monitor with headphones
Wear closed back headphones and listen to what is actually being recorded, not just to the room. Headphones reveal problems you would never notice otherwise: a rustling lav, a buzzing cable, a distant siren or a loose connection. Never assume the audio is fine because the level meters are moving.
Handle wind and handling noise
- Use a foam windscreen indoors and a furry windshield (often called a dead cat) outdoors. Even a light breeze can ruin a recording.
- Hold boom poles carefully and avoid moving your hands on the pole while recording.
- Use shock mounts to isolate the microphone from vibration.
- Secure lav cables with a loop and tape so movement does not transmit noise to the capsule.
Record room tone
Room tone is the sound of the location with nobody speaking. Record at least 30 seconds of it at every location, with everyone standing still and the same microphone setup. Editors use room tone to fill gaps, smooth cuts and make edits sound seamless.
Use a backup
Where possible, record audio in two places, for example a lav into a separate recorder and a shotgun into the camera. If one source fails or gets a burst of noise, the other can save the take. When recording separately from the camera, use a clapperboard or a clear hand clap at the start of each take to make syncing easy.
Clean up in post, gently
Most editing software includes noise reduction, equalization and compression tools. They can remove a steady hum or improve clarity, but heavy processing makes voices sound artificial and watery. Treat post production as a way to polish good recordings, not to rescue bad ones.
A quick pre recording checklist
- Microphone as close to the speaker as the shot allows.
- Noise sources switched off, echo reduced.
- Levels set manually, peaks around minus 12 dB.
- Headphones on and listening.
- Windscreen fitted, cables secured.
- Backup recording running.
- Room tone recorded.
Good sound is invisible: when it is done well, nobody notices it, and everyone stays with the story. Pair this with our guide on how to shoot a short film for the rest of the production process.